20 June, 2015

Boom tent

Last year I planned to build the regular bimini top and the sprayhood, however, I was still not convinced whenever to build a classical bimini top with all that tubing and If it will be practical for trailer boating.
So this year, because we are planning to go to a very sunny area, I made just a simple boom tent, which is very fast to put over the boom.

The shape is simple, looks like a broad pennant and it's made from a cheap PVC coated polyester canvas 430g/m2.


testing the tent...

... with 6 battens


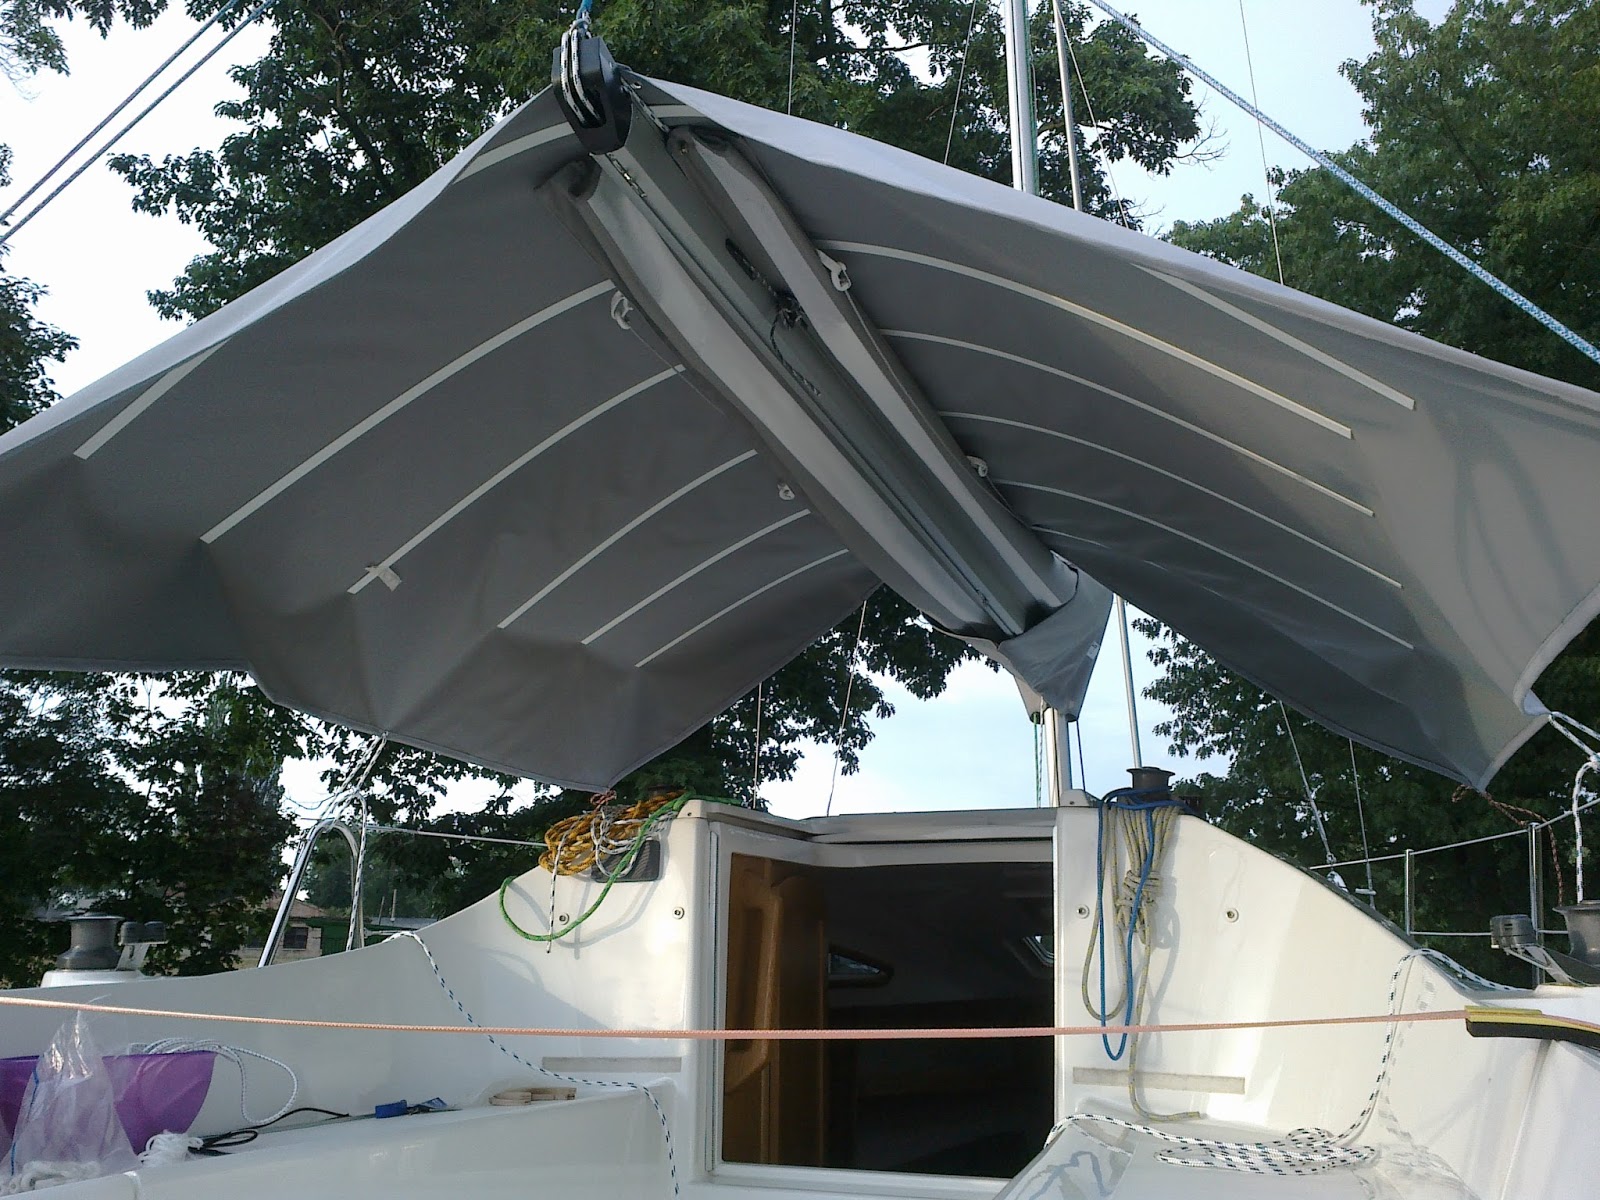
As you can see on the picture below, I've simplified the design and reduced 6 battens to just 3 "bars" (on the left). It's made from two ordinary sail battens (24x2.5x2000mm) sewn into a "sock" to prevent touching the glass fibers. This batten "sock" has a 3 velcro strips on it as well as the tent so it's very easy to put it on or stow the tent into the cockpit.


final shape with batten socks
 
canvas cutting tool - ordinary soldering iron with modified copper tip


The canvas is then attached to the boat with 8 straps with adjustable trident quick release buckle clips (3 per sides, one over the mast and one over the topping lift).

sailing with a boom tent

boom ten in hot days


The following trips proofed, it's very handy, practical and stable in a light wind (15 kn).
I think it is also probably too long, so I think I will cut it in the front by a few decimeters to be able to go to the bow more easily.
The only downside of this solution is that it slightly cover the solar panel and degrade power generation. Anyway, I plan the additional solar panel on the stern so this will somehow mitigate this issue.

Update on 14.10.2016 - I've replaced this tent with a regular bimini top. Check out here!

09 June, 2015

Gas tank upgrade - ventilation

Nobody likes the gas vapors in the cockpit lockers, so I decided to upgrade our portable gas tank and add the overboard ventilation. I did not let the boatyard install that standard big locker ventilation grilles, because in heavy rain, the drops can easily jump through the grille into the locker. More holes means more problems with water :-)
I don't have any issues with the humidity or mold in the lockers, because the locker is not air tight anyway.

Because I have a portable gas tank, I wanted to make it simple for manipulation, so all the hose connections are made using the click-on connectors (Chrysler type).

Overboard vented Thru-hull

Transparent PVC, oil resistant ventilation hose
The hose is going straight upwards to prevent gas collection when the boat is heeled
(Its not visible, but the hose is attached via the self-adhesive tie downs)

Ventilation cap on the tank is closed and the tank can breathe all the time


Fuel hose and the outboard 12V connector (UCHEN 50Amps)
There is also one positive point of this conversion, that during anchorage, I always closed the vent cap on the tank to prevent gas vapors, but a built up gas pressure had a negative influence on the outboard carburetor. Simply pushing the gas into the outboard if not able to escape naturally and sometimes had a problem while starting. Not speaking of the fuel spills when I tried to disconnect the fuel hose from the outboard.
One more enhancement finished - more to come.

01 June, 2015

Another load of small boat improvements

This is just a short update on various modifications I've done last month. A picture is worth a thousand words :-)

Radio controlled clocks, moon phase, air pressure and sunrise/sunset times
National Geographic

Windex on the mast - quick disconnect version

The following wooden roller furling support is not my idea, but it's very practical. Previously I had there the pieces of foam, but that disintegrate from the UV-rays into powder.

Roller furling support

Eight more times
That tiny holes were just used to hold down the wooden template used for router carving

Roller furling supports on the mast

New lifelines to keep the children aboard
 
Tubing brackets and lifelines with snap shackles
Simple backstay adjuster 2:1 with Dyneema line

Foldable keel support roller on the back of the trailer

Our boat is not a blue water cruiser so the hull is not as thick as one could expect. Since we keep the boat mainly on the trailer, she has to be sitting on the trailer comfortably without any stress, otherwise it could lead to some problems like we found out a very soon after delivery - for more details please check here in chapter 2.

So a dealer modified our trailer from a keel rollers to a bunks, which is much better now. However to spread the load on the aft of the hull, he had to add one keel support roller to the center.
Without that, the hull on the port side of the aft support pad seems to bend inwards too much.
One of our friends who has the same boat also found the same issue. It looks like the hull is thin there.

The keel support roller on a rusted cross member

Because this keel support is pretty high, we had once a problem with launching on a gradual slip. We had to detach the trailer from the hook and move it much more into water to load the boat on it.

To overcome this problem I've made this support roller foldable. So once we will have the same problem, just simply fold the roller and lower the side support pads.

It's made from the original cross member (60x40x3mm). I just cut the ends and welded two small tubes onto each side of the central section to create a pivoting part. Then just drilled the holes for a locking pin and a handle pin and had it hot-dip galvanized.

Working position

Locking pins on both ends

Folded down - holes on both sides for the handle and locking pin

Folded down

From the last picture you can see that folded L-profile has a sharp edge. Hopefully the hull will never touch it. If it does, I will sand it or insert some long screw to the L-profile near the roller against the trailer cross member so the roller holder will stay parallel with the trailer frame.

Wooden cockpit table

When we were ordering our boat we specified we would like to install just the bottom fitting for the cockpit table. The boatyard finally was so kind that they gave us the complete cockpit table. Unfortunately, that original round fiberglass table is very heavy which makes it pretty impractical to install.
So I build a new wooden one from the 10mm marine plywood and oak veneer.

I started by cutting the plywood into size of 60x35cm with rounded corners. The most difficult part was to glue a 1mm oak veneer on the edge of the plywood. To fix the veneer until the glue hardens I had to build a support structure with two adjustable sides.

Gluing edge veneer using this support structure

Gluing oak joists on the edge of the table

After 3 coats of the satin varnish

Beautiful table waiting to be dished out
I don't have the picture of the stainless table fitting, but it's an original custom made tubing in the form of X with a small tube in the middle and a hand screw for the support pole.

This table can be stored inside the cabin or can easily fit in the fuel cockpit locker.