14 July, 2015

Adriatic Sea - Croatia 2015

Since we bought our boat, we have always wanted to sail the sea and one of the most beautiful seas in the Europe is the Adriatic sea. It has very clear and warm water, which is a must for if you have small kids, so let's go there. Unfortunately, it's pretty far away from Prague, around 1000km, but on the other hand, I managed to get 3 weeks of vacation, which is the ideal minimum for such a trip.

Anyway, with the preparation of the boat I've lost a few days, which includes boat bottom job using the
McLube's Antifoul Alternative Speed Polish. I was a bit skeptical about it, but it has proved its functionality and protected the boat pretty well from the seawater growth and is easy to apply.

The most extensive task was, however planning of the trip which took me a few months. Get all the required paper maps, Navionics maps for our 7" Android tabled and buy a VHF radio.
I know that fixed mount unit is better than the handheld unit in terms of the range, but I've not managed where to install it so it can be easily reached from the cockpit. So for now I've decided to buy a portable floating radio Polmar Navy-011F. I have to say that this radio is very good and since I'm not sailing too far from the shore, I was able to receive the Croatian weather forecast very clear. Even the communication with other boats a few miles away was ok.
Because it's a long trip and everything could happen, I decided to insure the boat with the Pantaenius Yacht insurance. I must say, that even it's not for free, it brings more peace in mind. On the other hand, we were lucky and nothing happened so I cannot say how the insurance company would deal with the possible claims.

The other thing I have to mention is that we planned the trip with our friend Venca and his MacGregror 26, who has also wonderful family with two small kids. The more kids are around, the better, because small kids simply needs a company and is a more fun :-)

Because we have a huge number of photos, I don't want to put them all into this post so click on the picture below to open a new window with the gallery:

Click on picture to get into the gallery

We also took some video so here it is:


Panorama view from "our" private island, where we searched for gold


This was a very close encounter with the dolphins:


And sailing on the waves:


For those who are interested, here is the log of our trip made using this inexpensive GPS logger Canmore GP-102+.  By the way, the Sailtracker.cz is the new project of the friend of mine David. Thanks man!

Click on the picture to get more details

I don't want to go into much detail of the trip, but I would like to summarize some value findings:
  • Solar panel under the boom provided power for the fridge for around 10 days in this summer days. The boom tent prevented the solar rays reaching the panel. It would need some additional solar panel mounted on the stern mast support to give it more power when anchored.
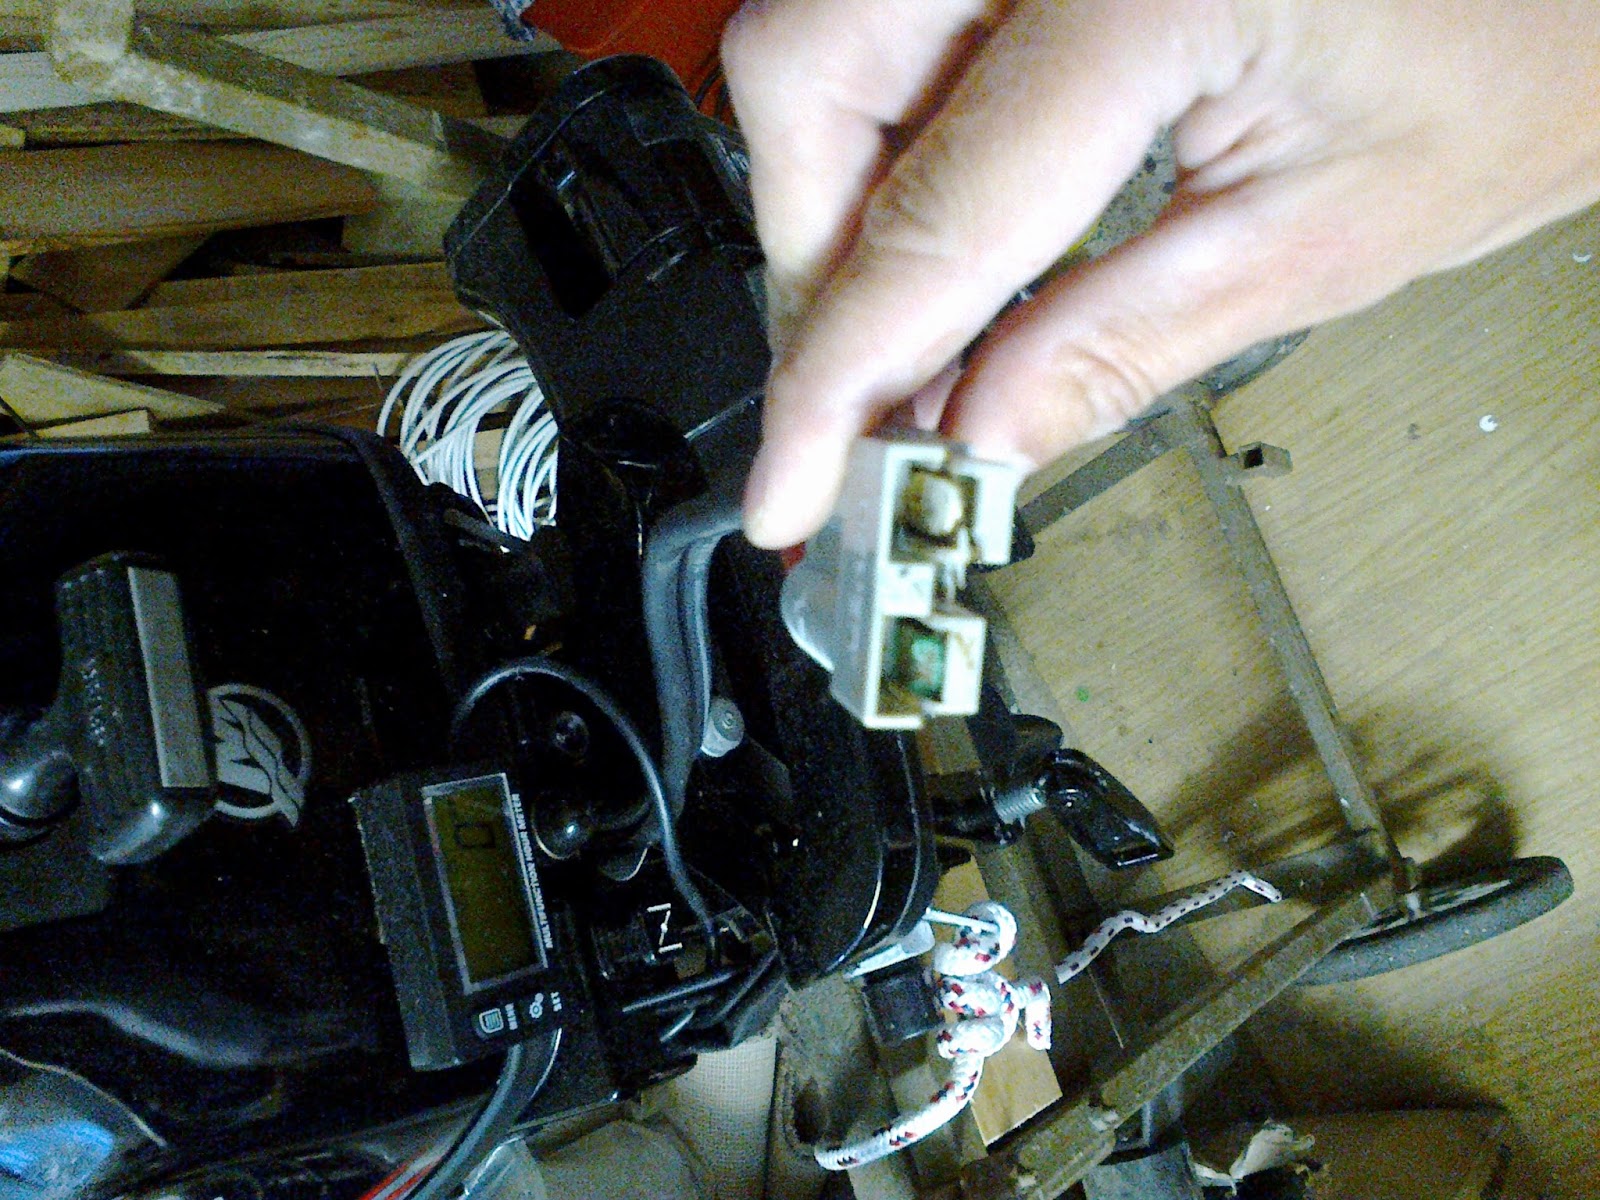
  • The UCHEN connector used for the outboard motor charging/starting cable deteriorated from the sun and salt water in not more than 5 days. More info at the bottom of this article.
  • If the centerboard is down it can be very noisy in the choppy water (banging sounds), because there is a big gap between the centerboard and case. One friend of mine who has the Phobos 24 fixed it by gluing a piece of carpeting inside the centerboard. I think I will fix it like this Avar Yacht A25 (formerly Janmor 25)
  • Centerboard spacer
  • All stainless hardware is unfortunately made from AISI 304, so a small amount of surface rust has developed. Adriatic sea is very salty, but when we arrived I've cleaned it with the oxalic acid. I've been told that citric acid can also help so I will try it the next time.

20 June, 2015

Boom tent

Last year I planned to build the regular bimini top and the sprayhood, however, I was still not convinced whenever to build a classical bimini top with all that tubing and If it will be practical for trailer boating.
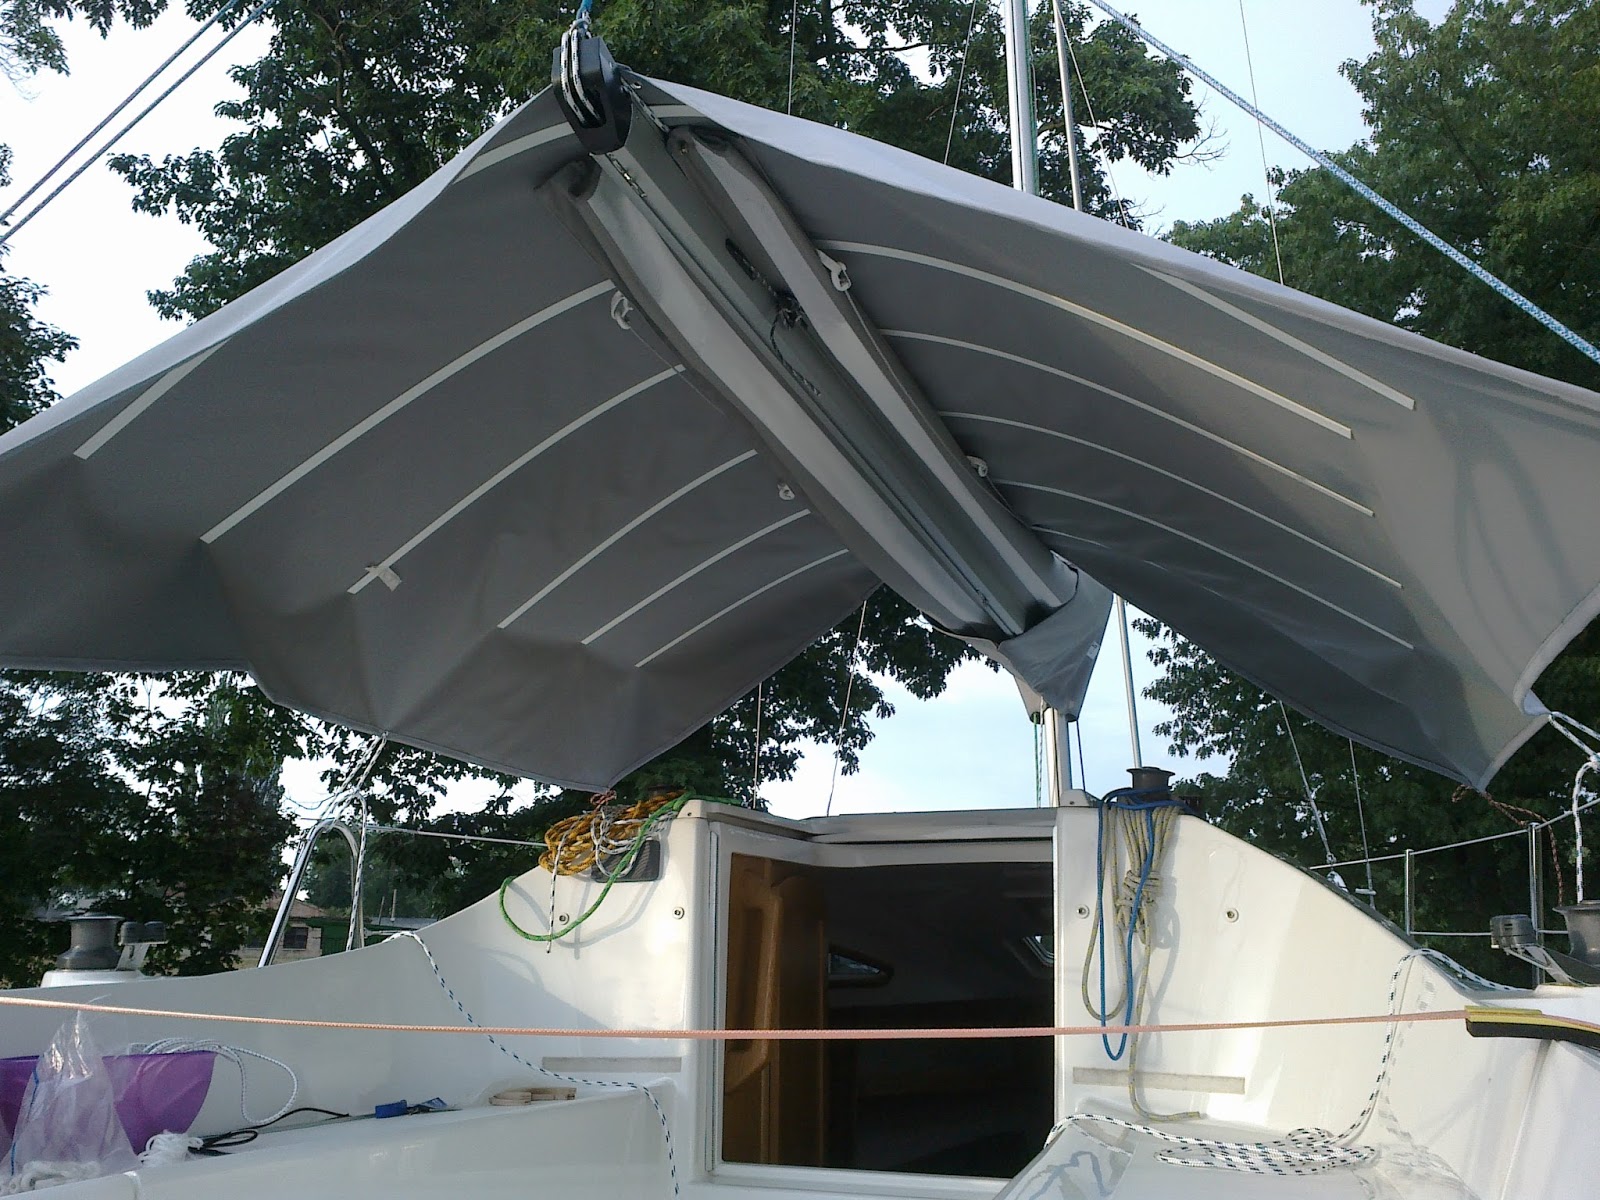
So this year, because we are planning to go to a very sunny area, I made just a simple boom tent, which is very fast to put over the boom.

The shape is simple, looks like a broad pennant and it's made from a cheap PVC coated polyester canvas 430g/m2.


testing the tent...

... with 6 battens


As you can see on the picture below, I've simplified the design and reduced 6 battens to just 3 "bars" (on the left). It's made from two ordinary sail battens (24x2.5x2000mm) sewn into a "sock" to prevent touching the glass fibers. This batten "sock" has a 3 velcro strips on it as well as the tent so it's very easy to put it on or stow the tent into the cockpit.


final shape with batten socks
 
canvas cutting tool - ordinary soldering iron with modified copper tip


The canvas is then attached to the boat with 8 straps with adjustable trident quick release buckle clips (3 per sides, one over the mast and one over the topping lift).

sailing with a boom tent

boom ten in hot days


The following trips proofed, it's very handy, practical and stable in a light wind (15 kn).
I think it is also probably too long, so I think I will cut it in the front by a few decimeters to be able to go to the bow more easily.
The only downside of this solution is that it slightly cover the solar panel and degrade power generation. Anyway, I plan the additional solar panel on the stern so this will somehow mitigate this issue.

Update on 14.10.2016 - I've replaced this tent with a regular bimini top. Check out here!

09 June, 2015

Gas tank upgrade - ventilation

Nobody likes the gas vapors in the cockpit lockers, so I decided to upgrade our portable gas tank and add the overboard ventilation. I did not let the boatyard install that standard big locker ventilation grilles, because in heavy rain, the drops can easily jump through the grille into the locker. More holes means more problems with water :-)
I don't have any issues with the humidity or mold in the lockers, because the locker is not air tight anyway.

Because I have a portable gas tank, I wanted to make it simple for manipulation, so all the hose connections are made using the click-on connectors (Chrysler type).

Overboard vented Thru-hull

Transparent PVC, oil resistant ventilation hose
The hose is going straight upwards to prevent gas collection when the boat is heeled
(Its not visible, but the hose is attached via the self-adhesive tie downs)

Ventilation cap on the tank is closed and the tank can breathe all the time


Fuel hose and the outboard 12V connector (UCHEN 50Amps)
There is also one positive point of this conversion, that during anchorage, I always closed the vent cap on the tank to prevent gas vapors, but a built up gas pressure had a negative influence on the outboard carburetor. Simply pushing the gas into the outboard if not able to escape naturally and sometimes had a problem while starting. Not speaking of the fuel spills when I tried to disconnect the fuel hose from the outboard.
One more enhancement finished - more to come.

01 June, 2015

Another load of small boat improvements

This is just a short update on various modifications I've done last month. A picture is worth a thousand words :-)

Radio controlled clocks, moon phase, air pressure and sunrise/sunset times
National Geographic

Windex on the mast - quick disconnect version

The following wooden roller furling support is not my idea, but it's very practical. Previously I had there the pieces of foam, but that disintegrate from the UV-rays into powder.

Roller furling support

Eight more times
That tiny holes were just used to hold down the wooden template used for router carving

Roller furling supports on the mast

New lifelines to keep the children aboard
 
Tubing brackets and lifelines with snap shackles
Simple backstay adjuster 2:1 with Dyneema line

Foldable keel support roller on the back of the trailer

Our boat is not a blue water cruiser so the hull is not as thick as one could expect. Since we keep the boat mainly on the trailer, she has to be sitting on the trailer comfortably without any stress, otherwise it could lead to some problems like we found out a very soon after delivery - for more details please check here in chapter 2.

So a dealer modified our trailer from a keel rollers to a bunks, which is much better now. However to spread the load on the aft of the hull, he had to add one keel support roller to the center.
Without that, the hull on the port side of the aft support pad seems to bend inwards too much.
One of our friends who has the same boat also found the same issue. It looks like the hull is thin there.

The keel support roller on a rusted cross member

Because this keel support is pretty high, we had once a problem with launching on a gradual slip. We had to detach the trailer from the hook and move it much more into water to load the boat on it.

To overcome this problem I've made this support roller foldable. So once we will have the same problem, just simply fold the roller and lower the side support pads.

It's made from the original cross member (60x40x3mm). I just cut the ends and welded two small tubes onto each side of the central section to create a pivoting part. Then just drilled the holes for a locking pin and a handle pin and had it hot-dip galvanized.

Working position

Locking pins on both ends

Folded down - holes on both sides for the handle and locking pin

Folded down

From the last picture you can see that folded L-profile has a sharp edge. Hopefully the hull will never touch it. If it does, I will sand it or insert some long screw to the L-profile near the roller against the trailer cross member so the roller holder will stay parallel with the trailer frame.

Wooden cockpit table

When we were ordering our boat we specified we would like to install just the bottom fitting for the cockpit table. The boatyard finally was so kind that they gave us the complete cockpit table. Unfortunately, that original round fiberglass table is very heavy which makes it pretty impractical to install.
So I build a new wooden one from the 10mm marine plywood and oak veneer.

I started by cutting the plywood into size of 60x35cm with rounded corners. The most difficult part was to glue a 1mm oak veneer on the edge of the plywood. To fix the veneer until the glue hardens I had to build a support structure with two adjustable sides.

Gluing edge veneer using this support structure

Gluing oak joists on the edge of the table

After 3 coats of the satin varnish

Beautiful table waiting to be dished out
I don't have the picture of the stainless table fitting, but it's an original custom made tubing in the form of X with a small tube in the middle and a hand screw for the support pole.

This table can be stored inside the cabin or can easily fit in the fuel cockpit locker.

21 May, 2015

Adding shocks onto our trailer

I'm now in the preparation for a longer trip to Croatia salt waters which consists of several upgrades made to our boat and trailer. One of the issues is the stability of the trailer around the speed of 90km/h. When we ride over some ditch on the road, the boat than  have a slight tendency to crosswise wagging. I've moved the center of gravity a little bit towards the hitch, but it did not help much. So I bought Knott's dumpers and added them to the axles.

both axles with mounted shocks

front axle

The only modification was to drill a hole for the bracket fasteners into the axle's holder so I will be able to install them within the mounting specifications. Then a small amount of zinc spray helps to prevent the rusting.

rear axle - had to drill a hole in a bracket for the fastener

looks like its aligned ok

bottom view... yet not fully fastened

I hope it will make our adventures more safety.

08 April, 2015

New outboard motor and it's tunning

It has been a while since my last post, but I've managed to get some new thing for our joy.

We sold our old Tohatsu 9.8HP stortshaft recently and bought a brand new Mercury F8 ELH, 8hp, long shaft with an electric starter. I must say, this Mercury has a brilliantly engineered tiller with all functions easy to reach. Since we have it from new, I wanted to have an overview about the service intervals and possibly tachometer. So I've ordered a waterproof multifunction hour meter with tachometer and replaceable battery Run Leader RL-HM028 and attached it to the motor.


Mercury F8 ELH - model year 2014

Installation of the multifunction display was pretty easy, just followed the instructions and without any drilling. For the best view I decided to put the display on the front of the cowling using an included velcro tape.

multifunction display attached to cowling using velcro


velcro attached for easy detachment from the cowling
yellow wire on the top is going from the display
and is just wrapped over the spark-plug wire
then covered by self-vulcanizing stretch tape

The additional "tuning" was the installation of the connector on the battery cable. That gray connector is UCHEN 50Amp with silver plated contacts and stainless steel springs. So I just cut the original cable and soldered the cables. For soldering you have to use a big soldering iron, because the wire is pretty thick and the connector dispatch much of the heat.

UCHEN 50Amp connector
We are going to use this outboard also on an inflatable, so on our sailboat I have to wire up a new battery cable and connector and this original cable will be used for battery in the inflatable.

The first start of the motor using only the button is a dream... My wive loves it.

More updates soon - low cost cabin heater, Omnia oven review and more ....


Update 16.10.2015  - Warning about the UCHEN connectors !!!

If you have decided to use this UCHEN connector in a salt water, please DON'T! It disintegrated just after 2 weeks in saltwater and stopped working completely. The plastic cover cracked by itself and the contacts oxidized completely.

UCHEN connector just after 2 weeks in salt water
I've now replaced this connector with water-proof MC4 connectors used for solar panels. It's a much better connection now so I hope it will last a few years.

02 December, 2014

Boat Expo 2014 in Prague

The winter and spring is time of several boat shows across the Europe and this weekend it was held in our country in Prague. It's called Boat Expo 2014 and it's not that big due to the small market, but this time there were two sailboats from Dalpol - Phobos 21 and Phobos 25 in the"Exclusive" edition.
We wanted to see, how the Dalpol evolve in time and also to get some inspiration of the new features.
Thanks to our boat dealer Mr. Linhart, we were able to visit the boat show for free and have a nice chat.
There was also plenty of power boats and one other sailboat Mariner 24.

overall view

Phobos 21 class - hull #34. According to the dealer, this one will sail the seas of the Mediterranean.


inside Phobos 21

bigger galley with buildin fridge - my wife loves that


extra storage in the V-berth

depth instrument cover in the head

bilge cover

I was curious about the cabin floor and this boat has a completely flat floor with teak and holly plywood floor. It looks like the Dalpol fixed the issue on the convex floor that I have.

place for the propane bottle in the anchor locker -
I'm not sure this will comply with the marine standards!

new version of the stanchion fittings

And this is the second boat Phobos 25 - Exclusive edition:

inside Phobos 25


Dalpol logo in the cockpit


And finally the other interesting stuff:


Mariner 24


Torqeedo I tested this summer

There was no boat accessory this year, but let's look forward for the next years.